BoxHUD
View Repo
View on RedGuides
Download
A HUD which uses DanNet to display box information.
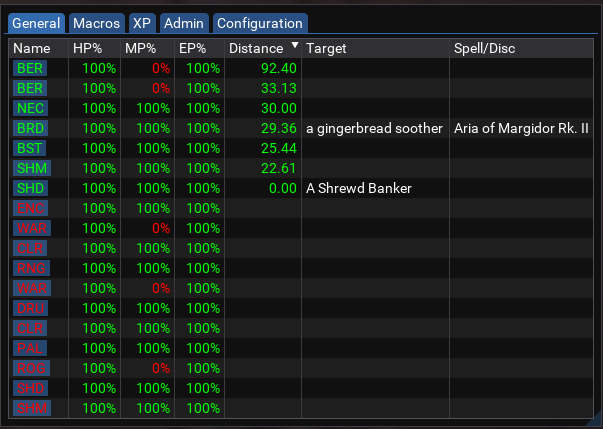
Overview
This Lua script provides an alternative to a similar MQ2HUD/MQ2NetBots based HUDs. Instead, it uses observed properties from MQ2DanNet to watch various bits of information about all your peers. It can also still use MQ2NetBots properties as well, though that is less tested.
Installation
Manual Install
- Clone the repo or download the zip file linked above.
- Move the
boxhudfolder into the MQluafolder. - Start the script with
/lua run boxhudand accept the prompt to installlfs.dll.
RedGuides Launcher
- Navigate to the BoxHUD resource page and click the
Watchbutton on theOverviewtab. - Open the RedGuides Launcher and install BoxHUD from the
Luatab. - Start the script with
/lua run boxhudand accept the prompt to installlfs.dll.
lfs.dll is lua file system from the MQ LuaRocks Server
Commands
/lua run boxhud-- Start the script/lua stop boxhud-- End the script/boxhud-- Toggle the UI window/bhadmin anon-- Toggle anon mode (swap names with class in name column)
Adding a new property to the HUD
To add new data to BoxHUD, there are a few steps:
- Decide what data you want to display. Refer to the MacroQuest TLO Docs to find the TLO member you are interested in displaying. For example, maybe you want to show
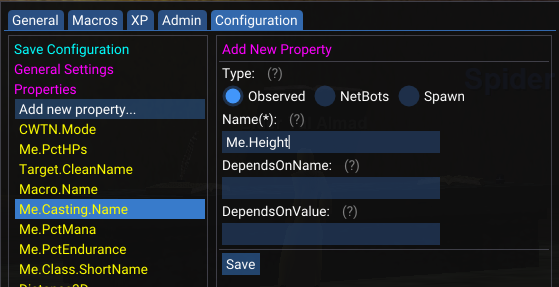
Me.Height. - Once you know the TLO member, the next step is to define a property for it. On the
Configtab, expandPropertiesand selectAdd New Property. Enter the TLO member as the property name,Me.Heightin the case of this example.
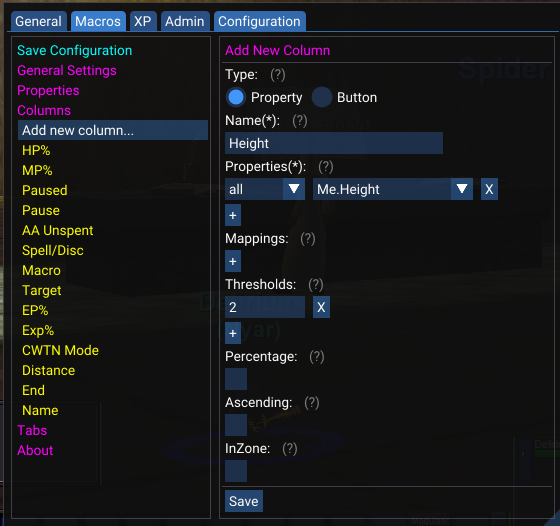
- After defining a property, a new column must be defined to describe how that property should be displayed. On the
Configtab, expandColumnsand selectAdd New Column. Enter a name for the column, such asHeight. Select the propertyMe.Heightto be displayed forallclasses. Set aThresholdvalue of2. This will cause the column to display toons with a height greater than2inred, and toons shorter than2ingreen.
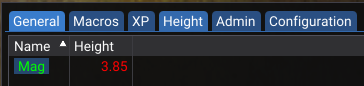
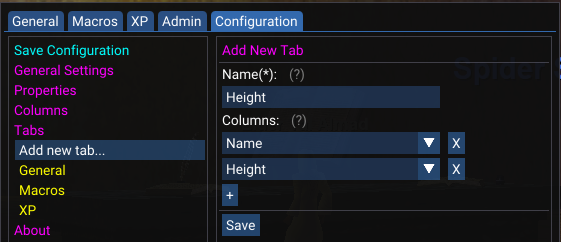
- The next step is to add the new column to a tab. It can be a new tab or one of the existing tabs. For the example, we will add a new tab called
Height. On theConfigtab, expandTabsand selectAdd New Tab. Enter the nameHeightfor the tab and add theHeightcolumn, then click save.
- Finally, add the new
Heighttab to the default window. On theConfigtab, expandWindowsand selectDefault. Click theEditbutton and add the newHeighttab, then click save.
At this point, the default BoxHUD window should be showing the new tab which displays a column with the height of each of your characters.